

Cloudflare LB Setup
Traffic -> Load Balancing -> Create Load Balancer (paid feature)
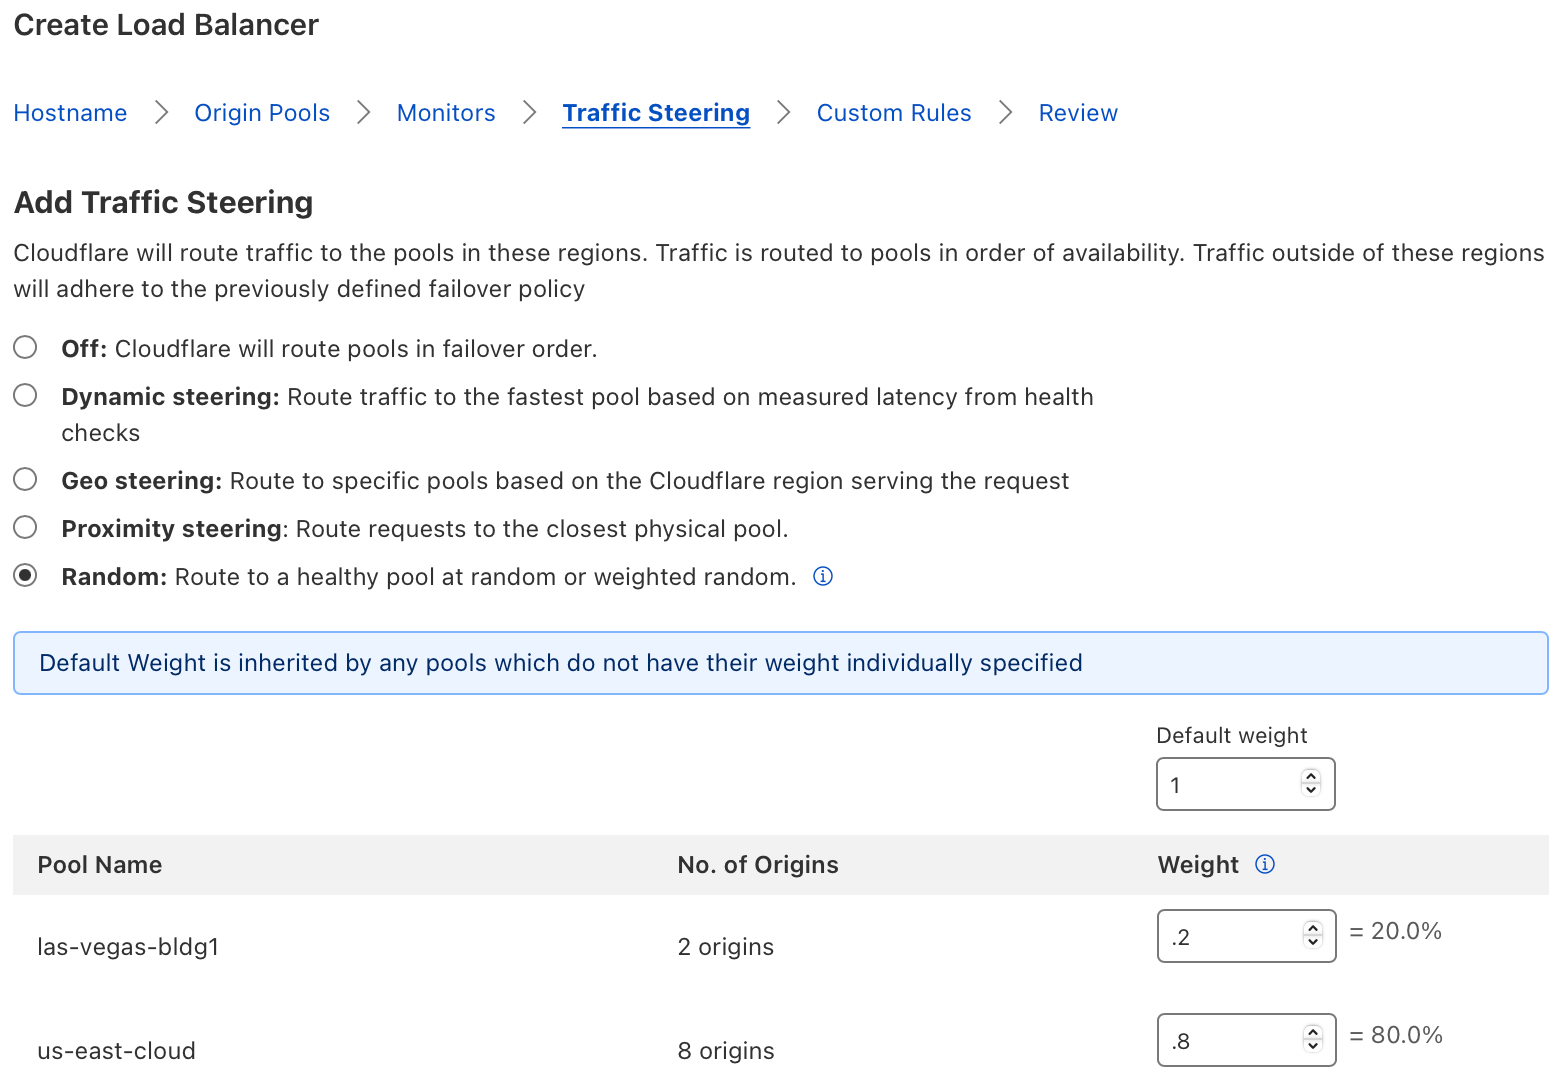
Each tunnel you created in the first step was assigned an origin address, which you’ll use here for the two orgins in your load balancer. I’ve set each to 50%, alternating each request evenly between the two tunnels. The hostname of your load balancer will be the endpoint that you can use for other CNAMEs as you add ingress rules for local services you want to host or expose. To ensure your LB groups show as healthy, add in the healthcheck endpoint defined in your ingress rules, which should look like this https://lb-hostname.domain.net/check I find this setup to be my preference vs hosting my own Traefik proxy (or similar) since I do not need to open up any ports on my firewall.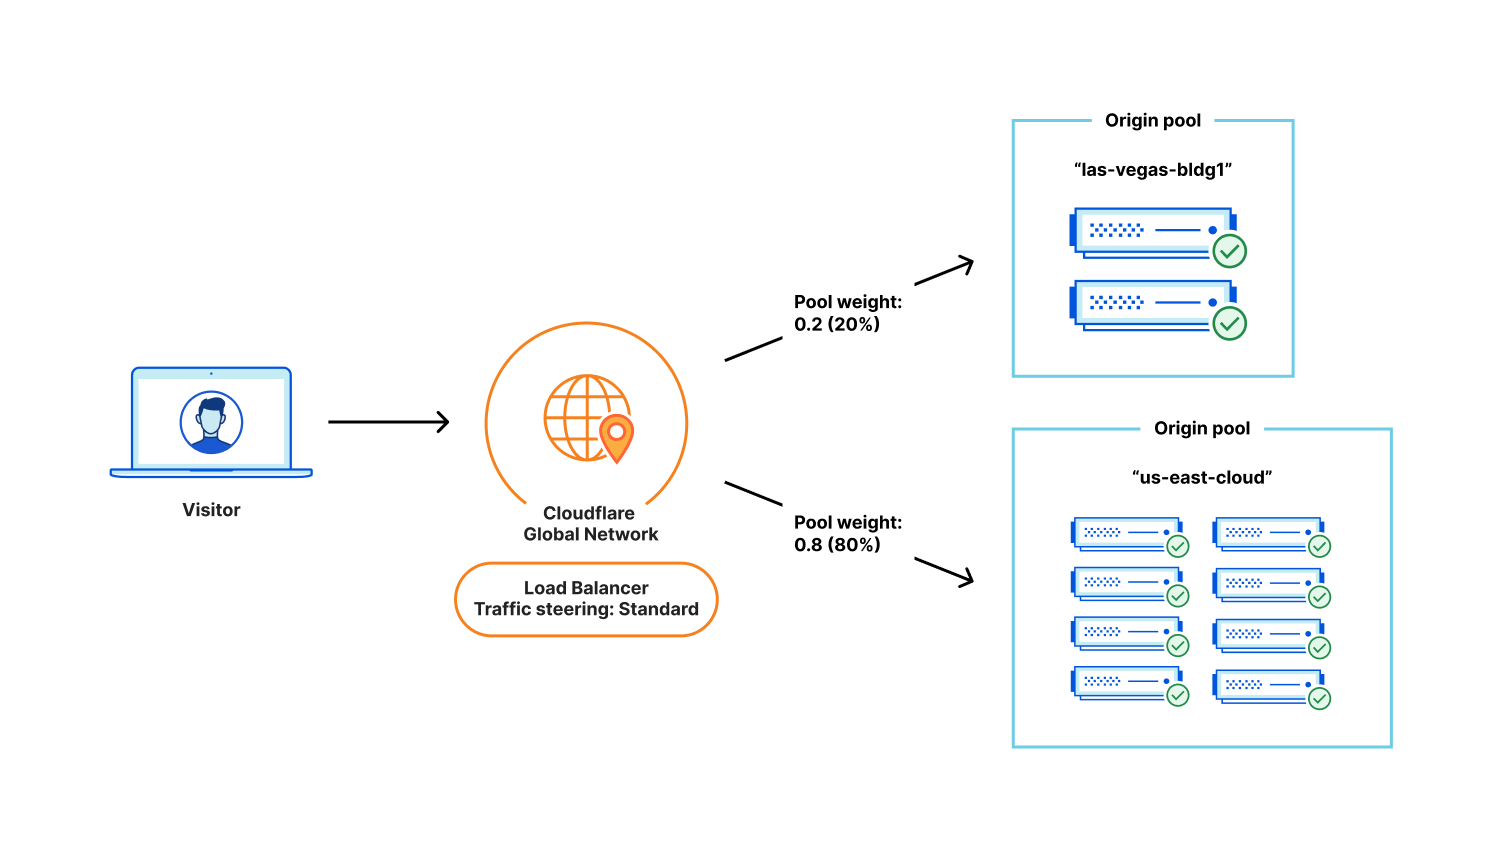
Note this is a paid feature. $5/month That’s it; you are load balanced! For high availability, you’ll need at least two devices running 24/7. For example, two Raspberry Pi’s running Docker engine with swarm enabled.
What is a Weighted Pool?
Before we can answer that, let’s take a quick look at how our load balancer works and define a few terms:
Origin Servers - Servers which sit behind Cloudflare and are often located in a customer-owned datacenter or at a public cloud provider.
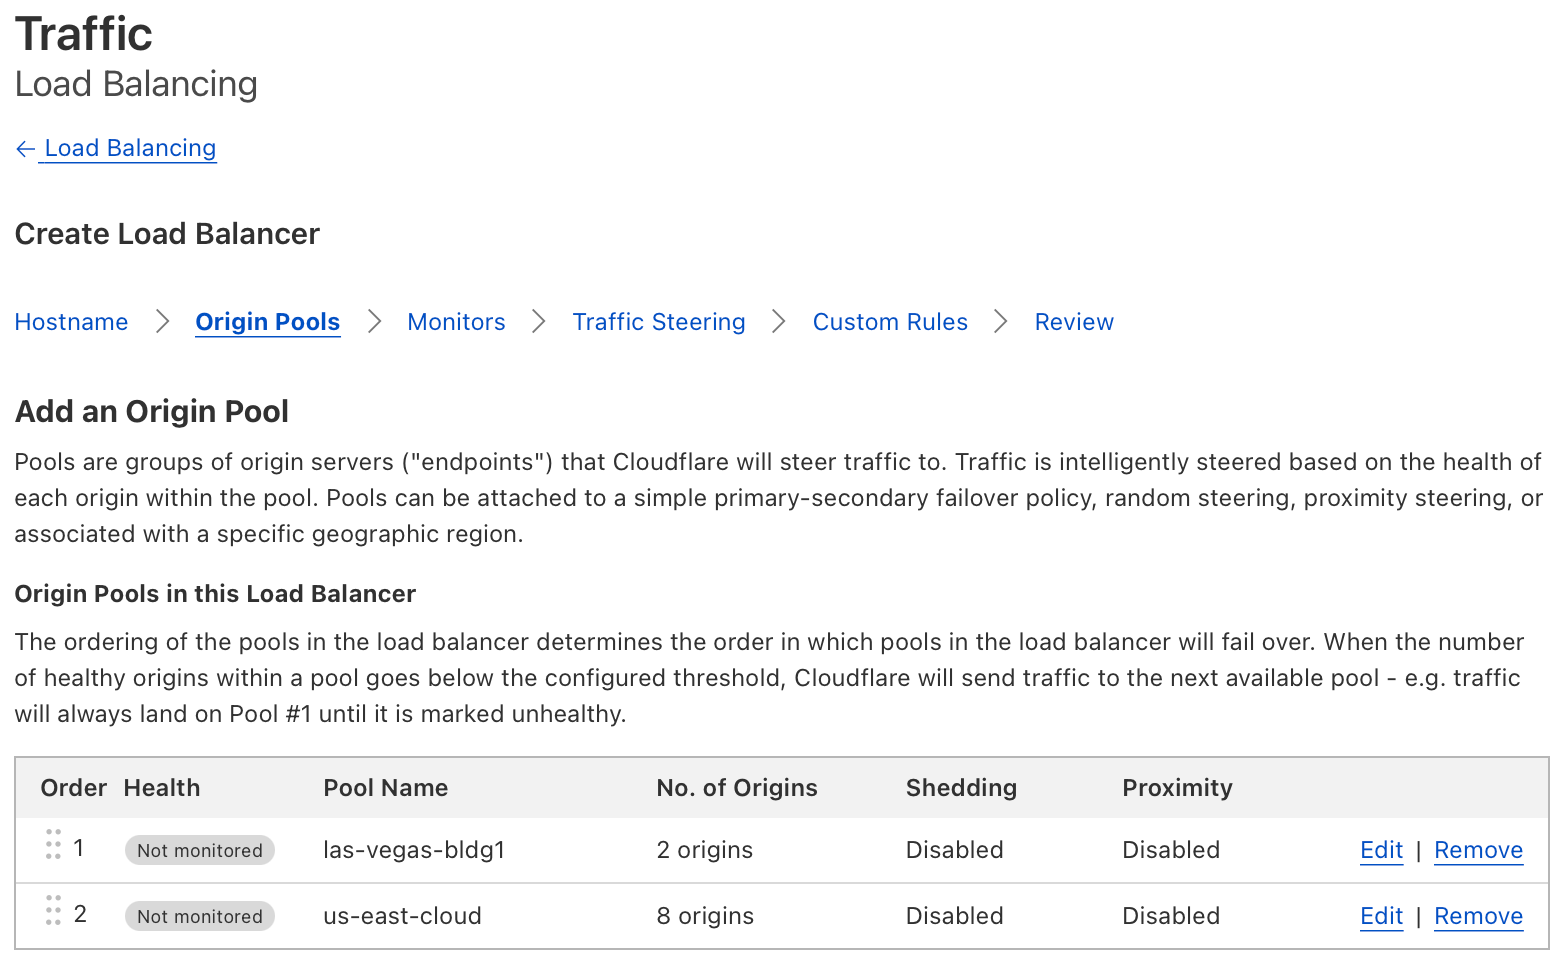
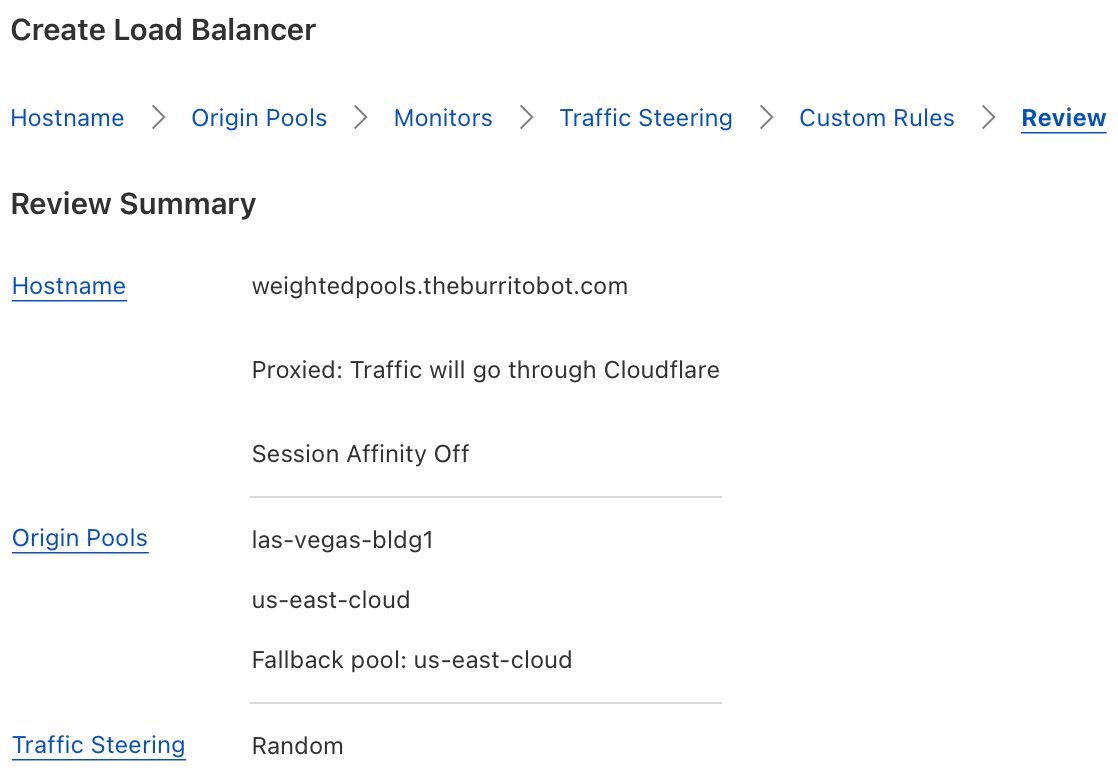
Origin Pool - A logical collection of origin servers. Most pools are named to represent data centers, or cloud providers like “us-east,” “las-vegas-bldg1,” or “phoenix-bldg2”. It is recommended to use pools to represent a collection of servers in the same physical location.
Traffic Steering Policy - A policy specifies how a load balancer should steer requests across origin pools. Depending on the steering policy, requests may be sent to the nearest pool as defined by latitude and longitude, the origin pool with the lowest latency, or based upon the location of the Cloudflare data center.
Pool Weight - A numerical value to describe what percentage of requests should be sent to a pool, relative to other pools.
Complete guide from Cludflare can also be found here